Activity
Your Activity, Explained
Every transaction across every connected account - categorized, taggable, and searchable. Where you go to understand where the money actually went.
Last updated
Welcome
The rest of the platform tracks what you own. Activity tracks what's actually moving - every debit, credit, transfer, and investment transaction that flowed through your connected accounts. If the dashboard tells you your net worth, Activity tells you why it changed.
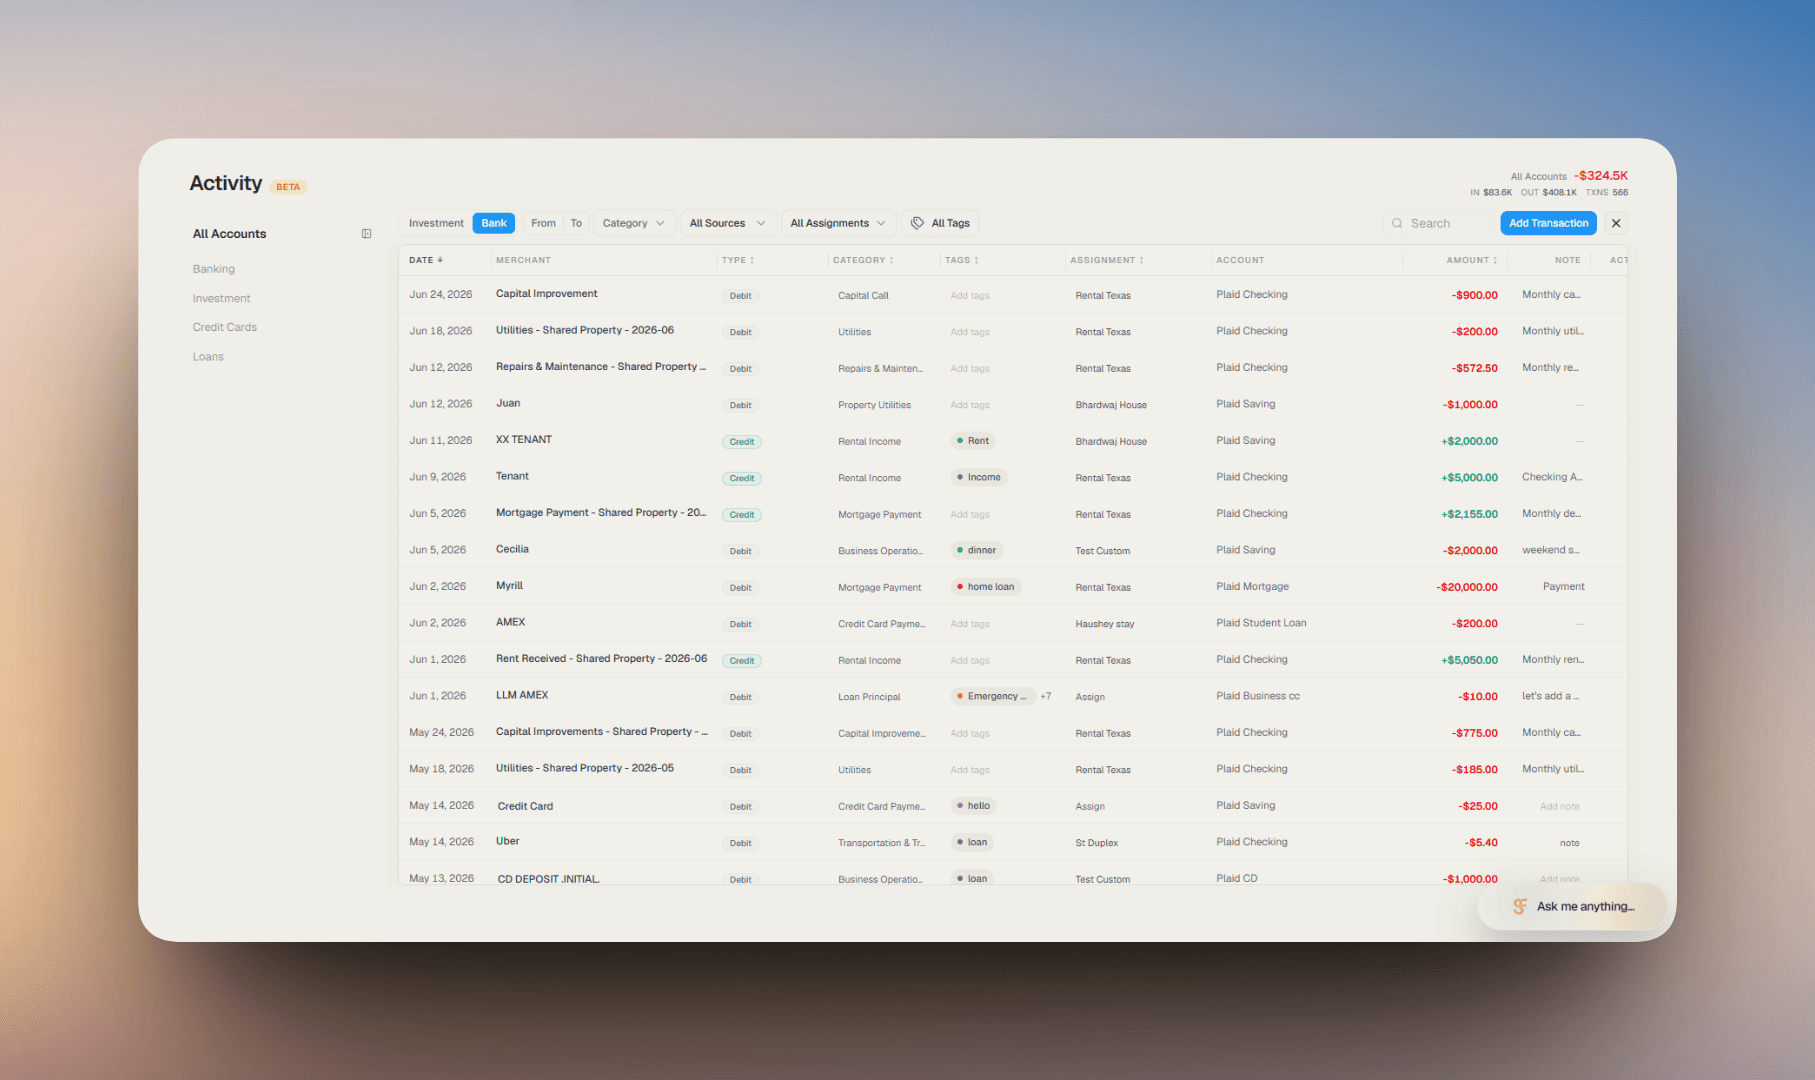
The page has two modes: Bank for day-to-day money movement (purchases, deposits, transfers) and Investment for brokerage activity (buys, sells, dividends, fees). They're separated because the questions you ask of each are different. Both share the same filtering, tagging, and editing system.
Connect your accounts, let the platform import your transactions automatically, then tag and categorize them so they're useful for budgeting, reporting, and tax time. The AI handles most of the categorization for you - your job is mostly to confirm, correct, and add tags where they matter.
This is a beta feature. Activity is still being refined. Expect occasional miscategorizations, missing data for some institutions, and features that may shift as we iterate. Please send feedback whenever something feels off; it's how we get the page out of beta.
The top row - flow metrics
At the top of the page, a set of metrics summarizes the activity in whatever you're currently viewing. They update live as you change filters, switch accounts, or narrow the date range.
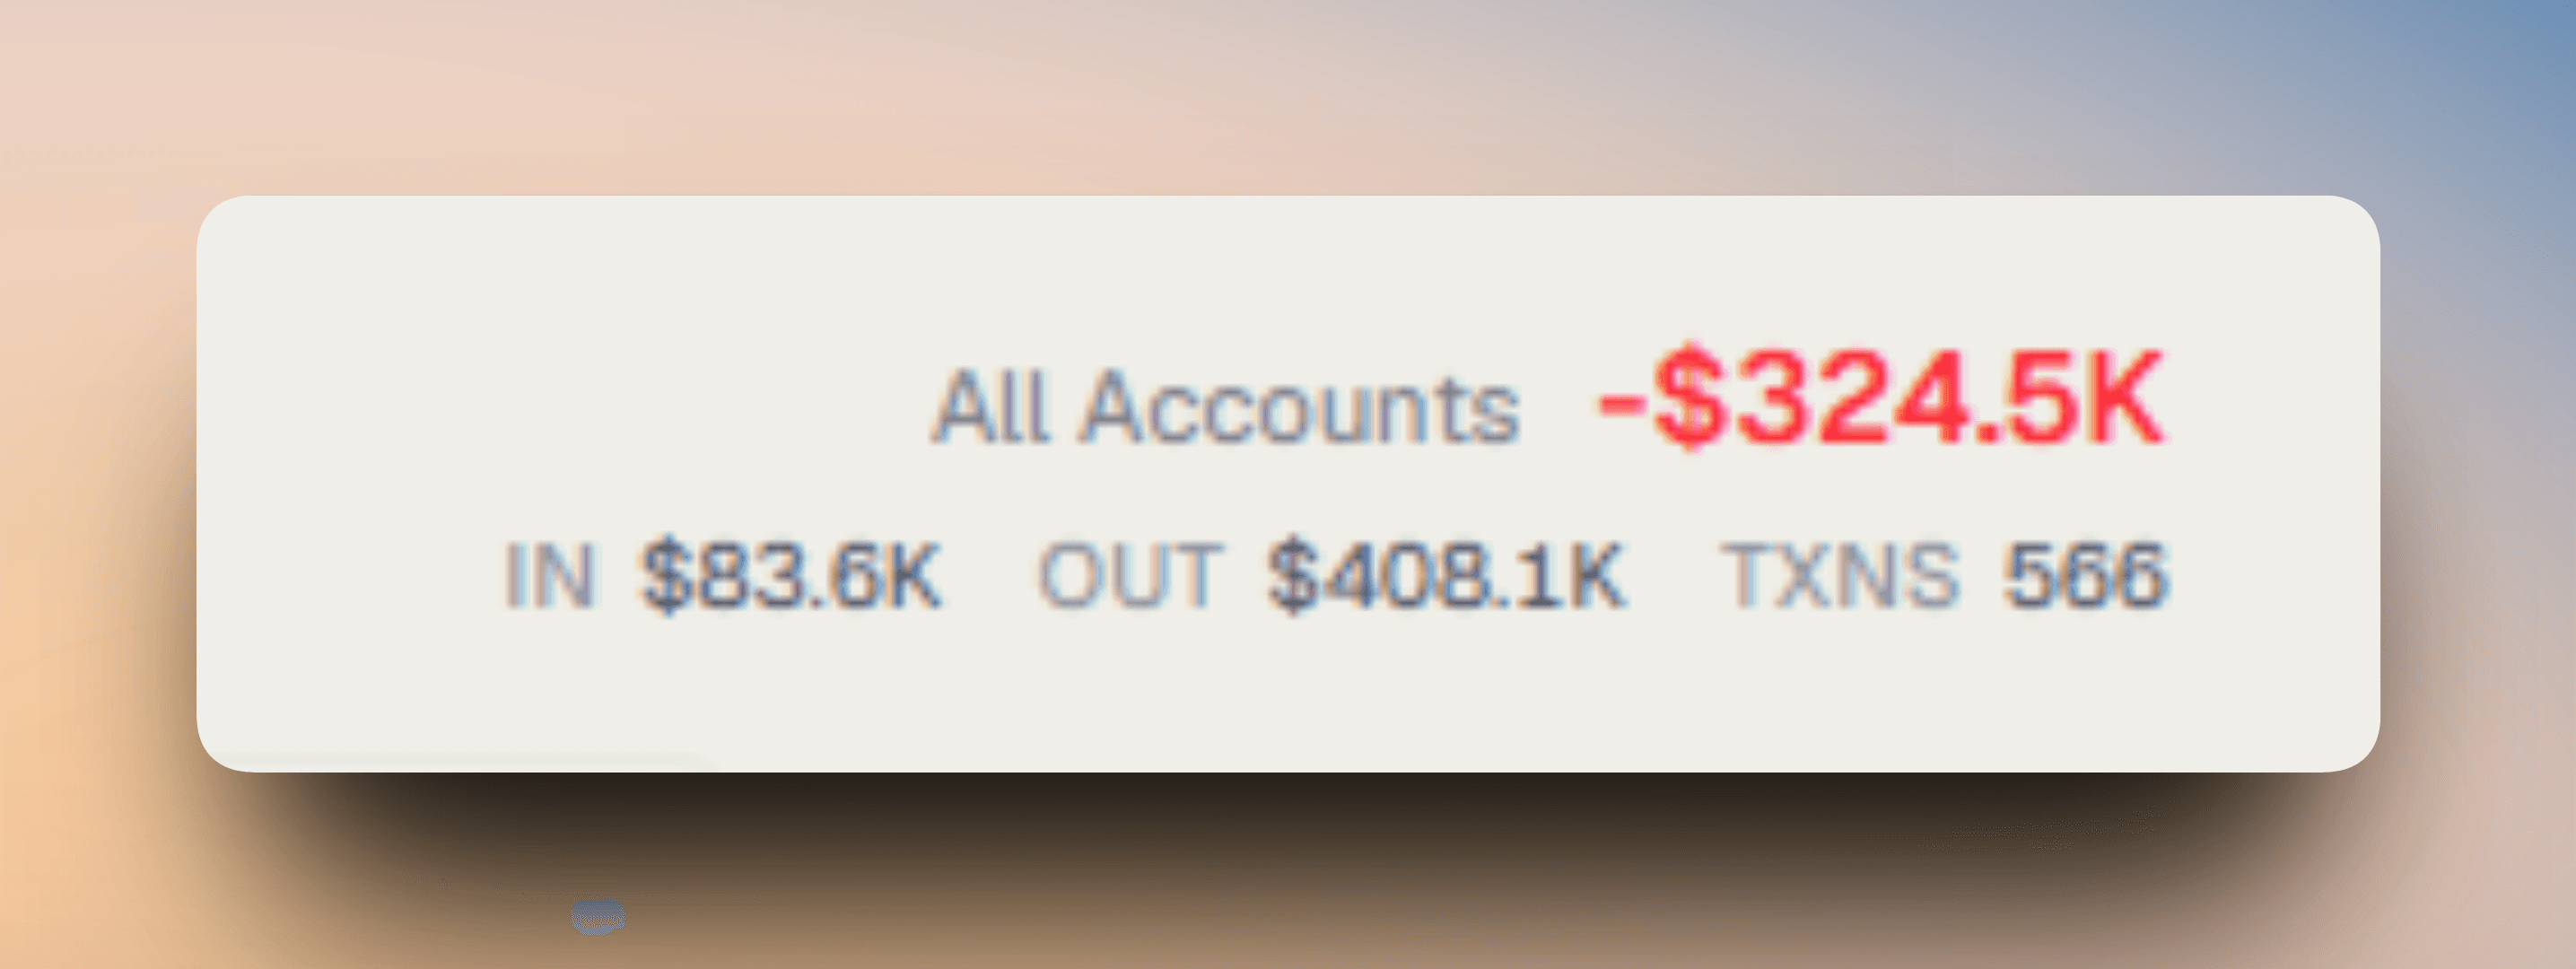
- Net Cashflow - Money in minus money out for the visible set. Shown in large type at the top. Green means more came in than went out; red is the opposite.
- Scope label - Shows what's currently filtered: "All Accounts", a specific account name, or "N Categories" when multiple are selected.
- IN - Total inflows - deposits, refunds, transfers in, income.
- OUT - Total outflows - purchases, payments, transfers out, fees.
- TXNS - Count of individual transactions visible. Useful for confirming filters are doing what you expect.
Filter to a single category and the metrics recalculate instantly. Filter to a date range and they recalculate again. Reading them in context with your filters is the whole point.
The account sidebar
On the left, your connected accounts are grouped into categories. Clicking a category or an individual account narrows the transaction list to just that selection. The sidebar is collapsible - click the toggle at the top to collapse it to a narrow icon rail when you need more table space.
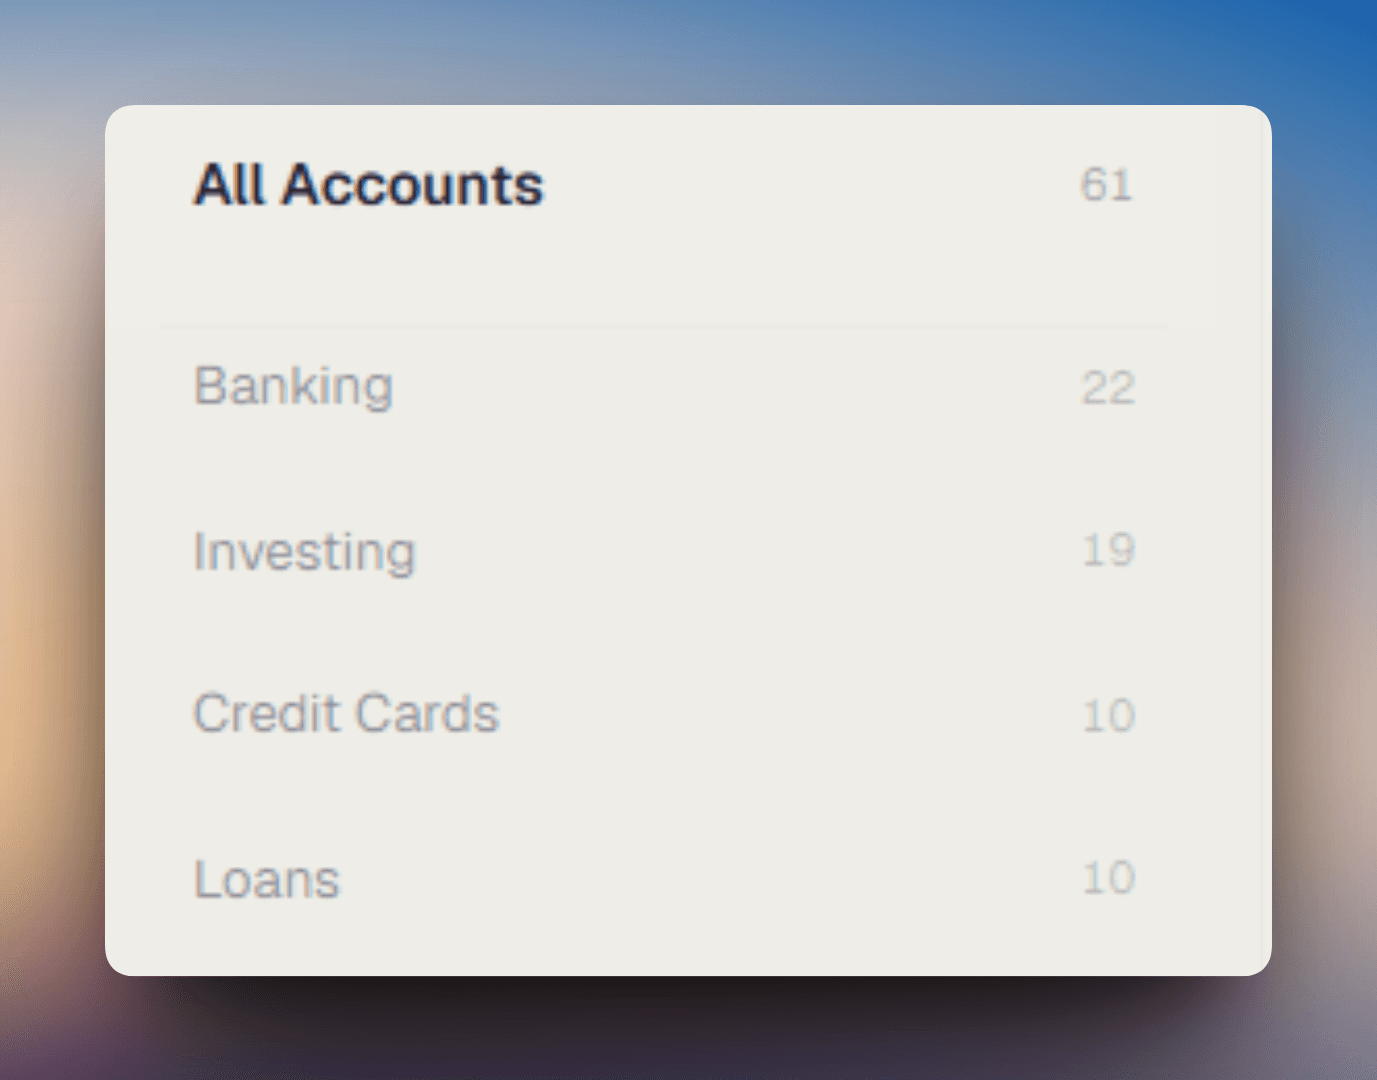
- Banking - Checking, savings, CDs, and money market accounts. The most active category for most users.
- Investing - Brokerage, IRAs, 401ks, HSAs, and 529s. Captures buys, sells, dividends, and fees.
- Credit Cards - Outflows are purchases; inflows are payments to the card.
- Loans - Mortgages, student loans, auto, and home equity. Tracks payments against principal and interest.
- Other - Accounts that don't fit the above categories.
Each account shows its institution name, masked account number, subtype (e.g., Checking, Roth IRA, Brokerage), and current balance. Click a category header to expand it and see all accounts inside. Click any individual account to filter to just that account's transactions. Multiple selections are supported - checkmarks show what's currently active.
The Clear link at the top of the sidebar resets all account and category selections in one click. Your sidebar collapse preference is saved automatically and persists across sessions.
The view toggle & filters
Above the transaction list, a toolbar lets you slice the data. Filters stack - each one narrows the visible set further.
- Bank / Investment toggle - Switches between your two transaction views. Bank shows day-to-day money movement. Investment shows brokerage activity with columns for ticker, type, quantity, and price.
- Type filter - In Bank mode: Credit or Debit. In Investment mode: Buy, Sell, Dividend, Fee, Interest, Cash, Transfer, and more.
- Category - Filter by transaction category (Restaurants, Shopping, Transportation, etc.) rather than account. The sidebar filters by where the transaction lives; this filters by what the transaction is.
- Source - All, Plaid (automatically imported), or Manual (transactions you entered yourself).
- Assignment - Filter to transactions assigned to a specific financial property or entity.
- Tags - Multi-select filter across your saved tags. Useful for quickly pulling up everything tagged for a client, a trip, or tax prep.
- Date range - From and To fields pin transactions to a specific window. When a date range is active, the list automatically sorts chronologically so you can read it in order.
- Search - Free-text search across merchant name, category, account, tags, and notes. Updates in real time as you type.
- Sort - Sort by Date, Amount, Type, Category, Tags, or Assignment. Toggle ascending or descending.
The Clear filters button resets everything at once. If the list looks empty or unexpected, this is usually the fastest fix.
Date range filters cannot include future dates. The end date also cannot be set before the start date - the picker enforces both.
Investment transactions
Switching to Investment mode shows brokerage activity with a different column set suited to securities transactions.
- Date - Settlement or trade date.
- Description - The transaction description as imported from your broker.
- Ticker - The security symbol (AAPL, BRK.B, etc.). Blank for non-security transactions like cash sweeps or fees.
- Type - Buy, Sell, Dividend, Fee, Interest, Cash, Transfer, Cancel, Split, or Other. Color-coded for quick scanning.
- Quantity - Number of shares or units. Sortable.
- Price - Per-share price at the time of the transaction. Sortable.
- Tags, Assignment, Note - Same as Bank mode - editable on all transactions. Date, description, and amount are locked on imported transactions.
Investment transactions are imported from your connected brokerage accounts. Description, ticker, and type come directly from the institution. You can add tags, assignments, and notes, but the core transaction data reflects what your broker reported.
Editing transactions
What you can edit depends on how the transaction was created. Imported (Plaid) transactions only allow editing Category, Tags, Assignment, and Note - the core transaction data (date, description, amount) comes from your bank and cannot be changed. Manual transactions are fully editable inline: every field including date, description, amount, and account can be updated directly in the row or via the edit dialog.
Change a category
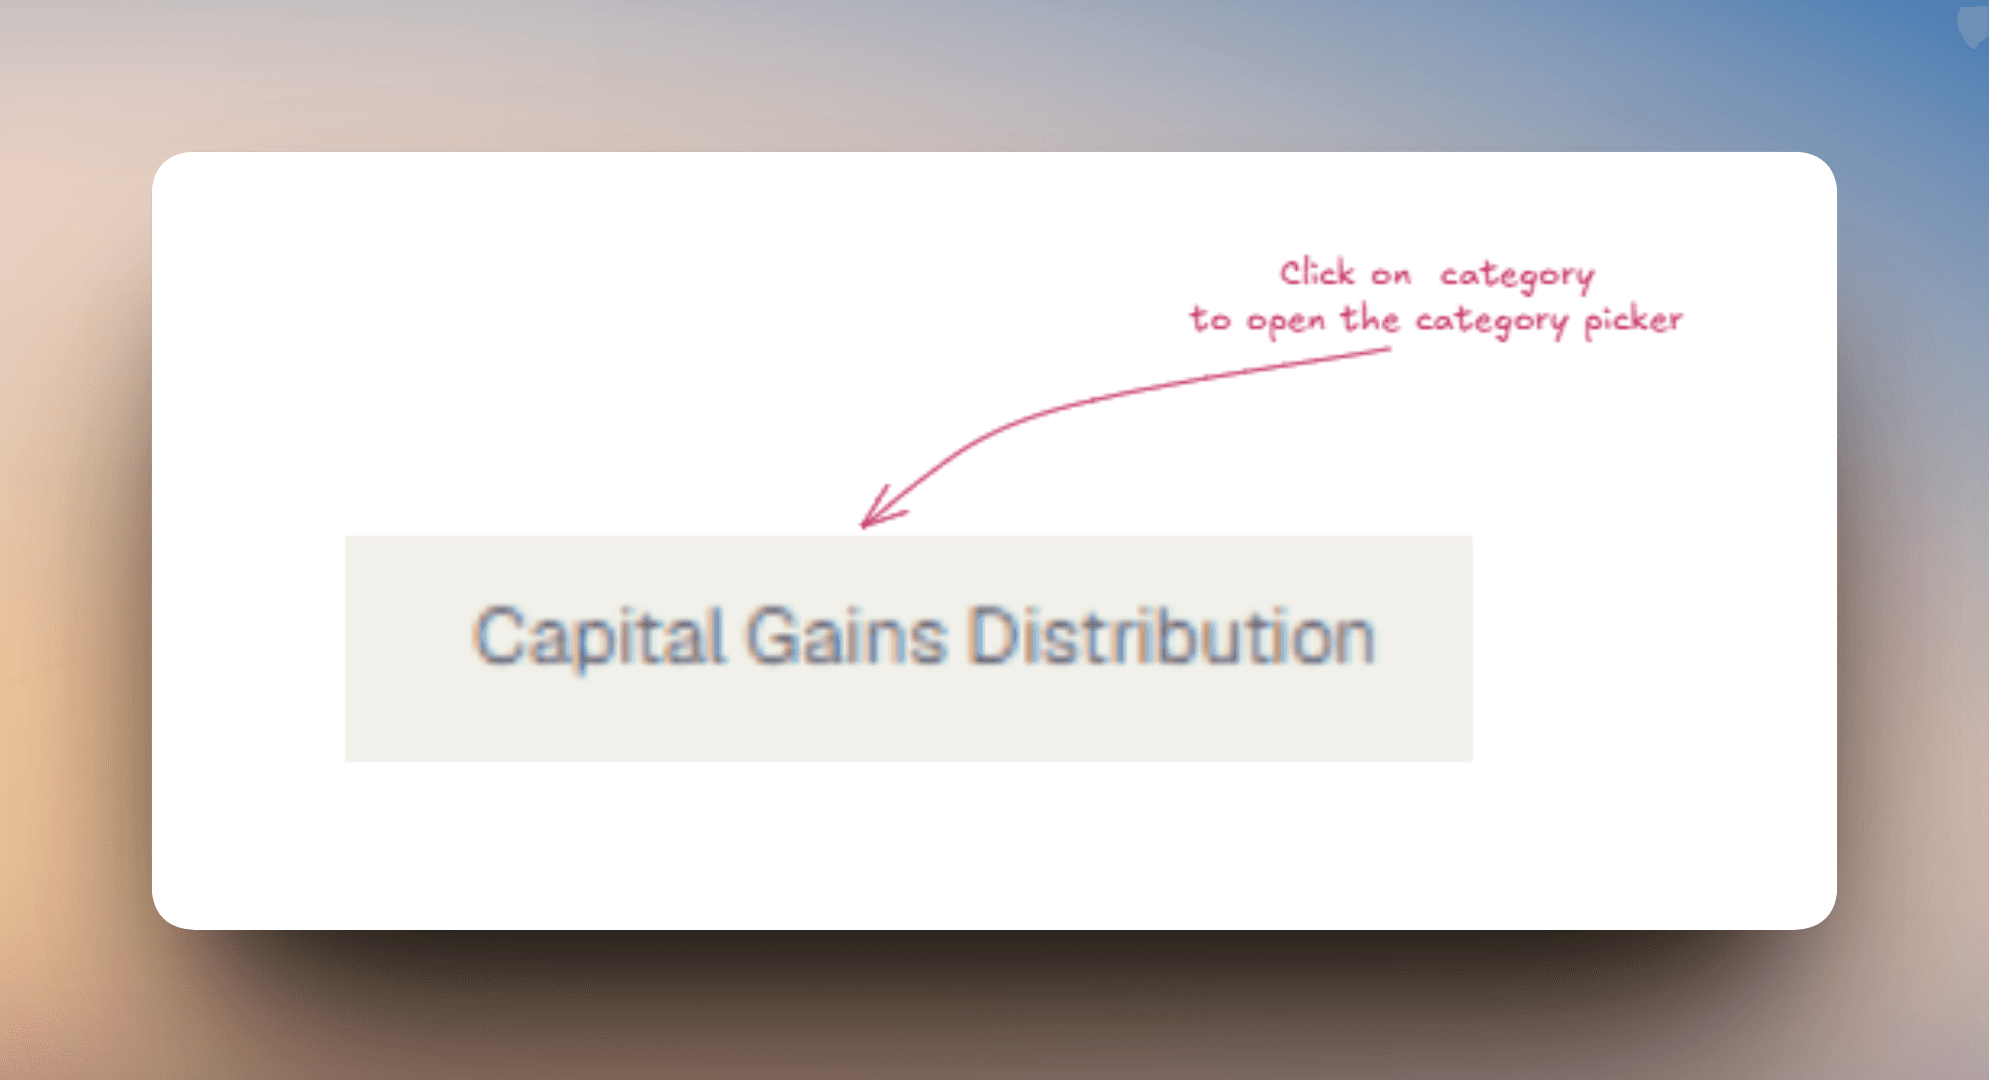
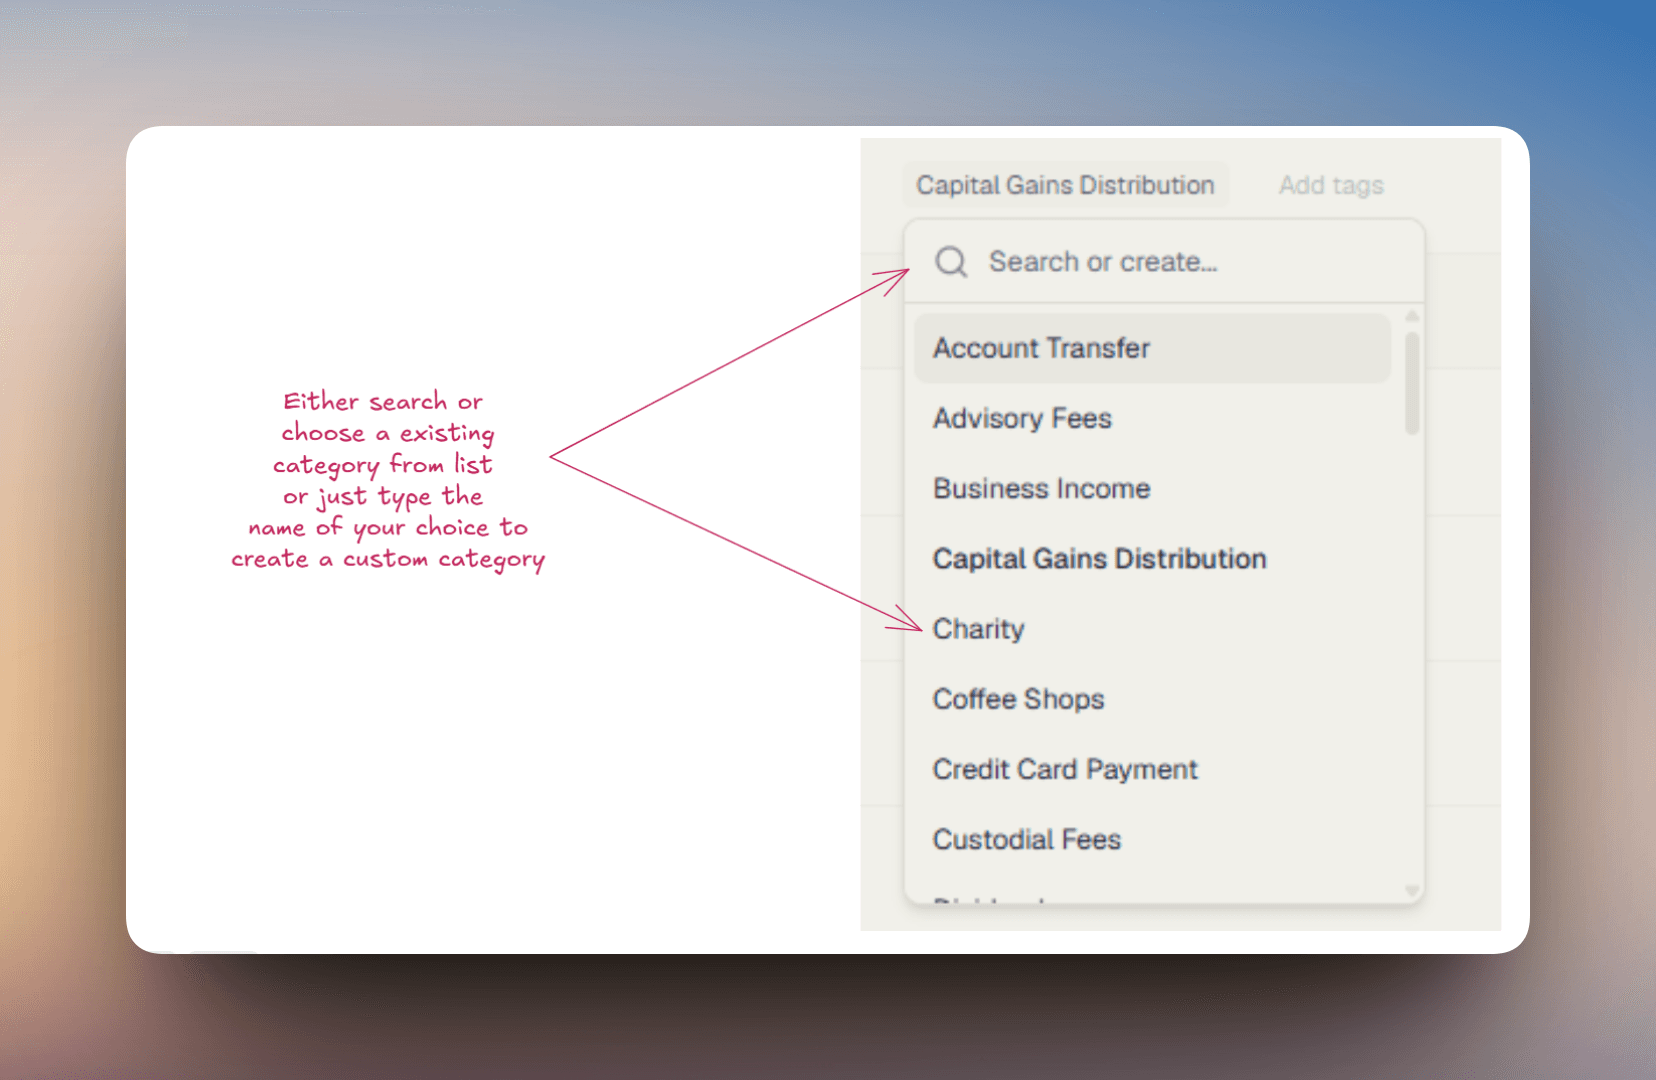
Click the category on any row. A picker appears with the full category hierarchy. Start typing to filter categories instantly - the picker uses typeahead search so results narrow in real time as you type. Pick the correct one and it saves instantly. After saving, the platform may detect similar transactions from the same merchant and offer to apply the same category automatically - see AI categorization below.
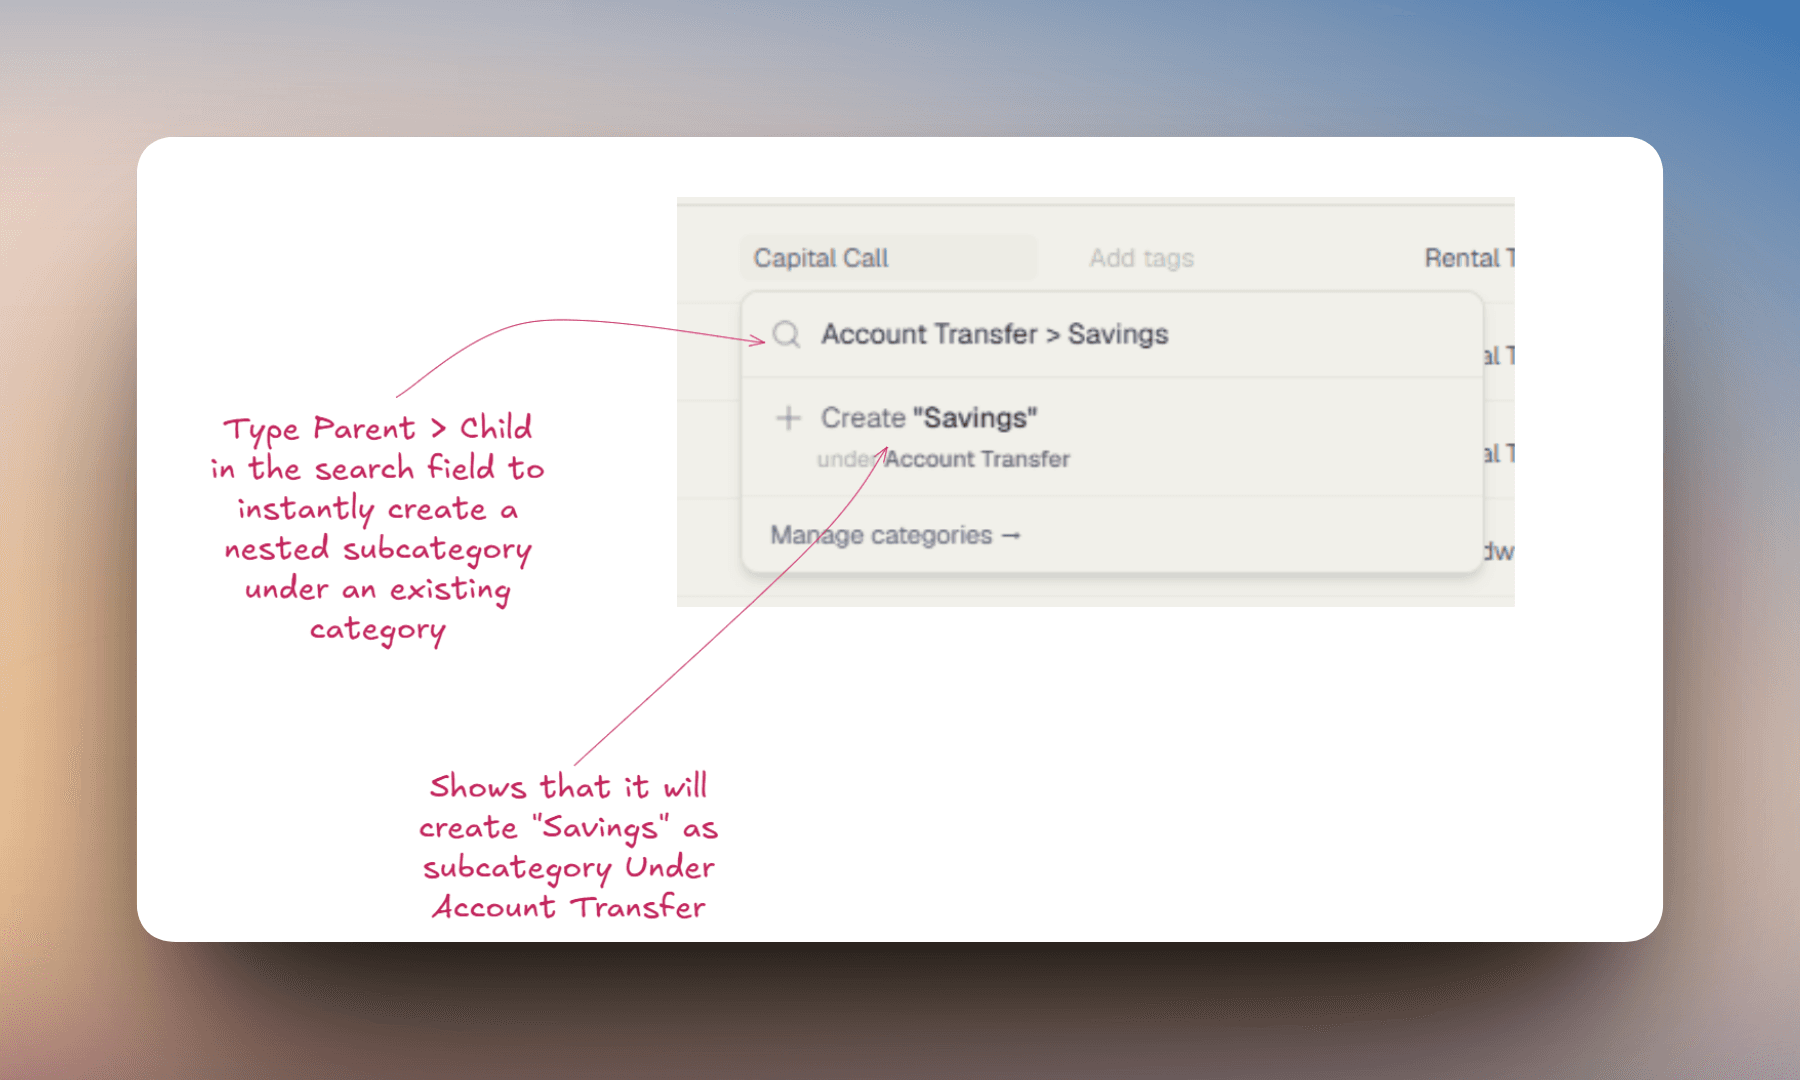
Create a subcategory - nesting syntax
Type Parent > Child in the search field (e.g., "Food > Takeout"). The picker detects the > separator and shows a Create 'Takeout' under Food option. Click it or press Enter. Chain multiple levels - "Food > Fast Food > Takeout" creates the full hierarchy in one go.
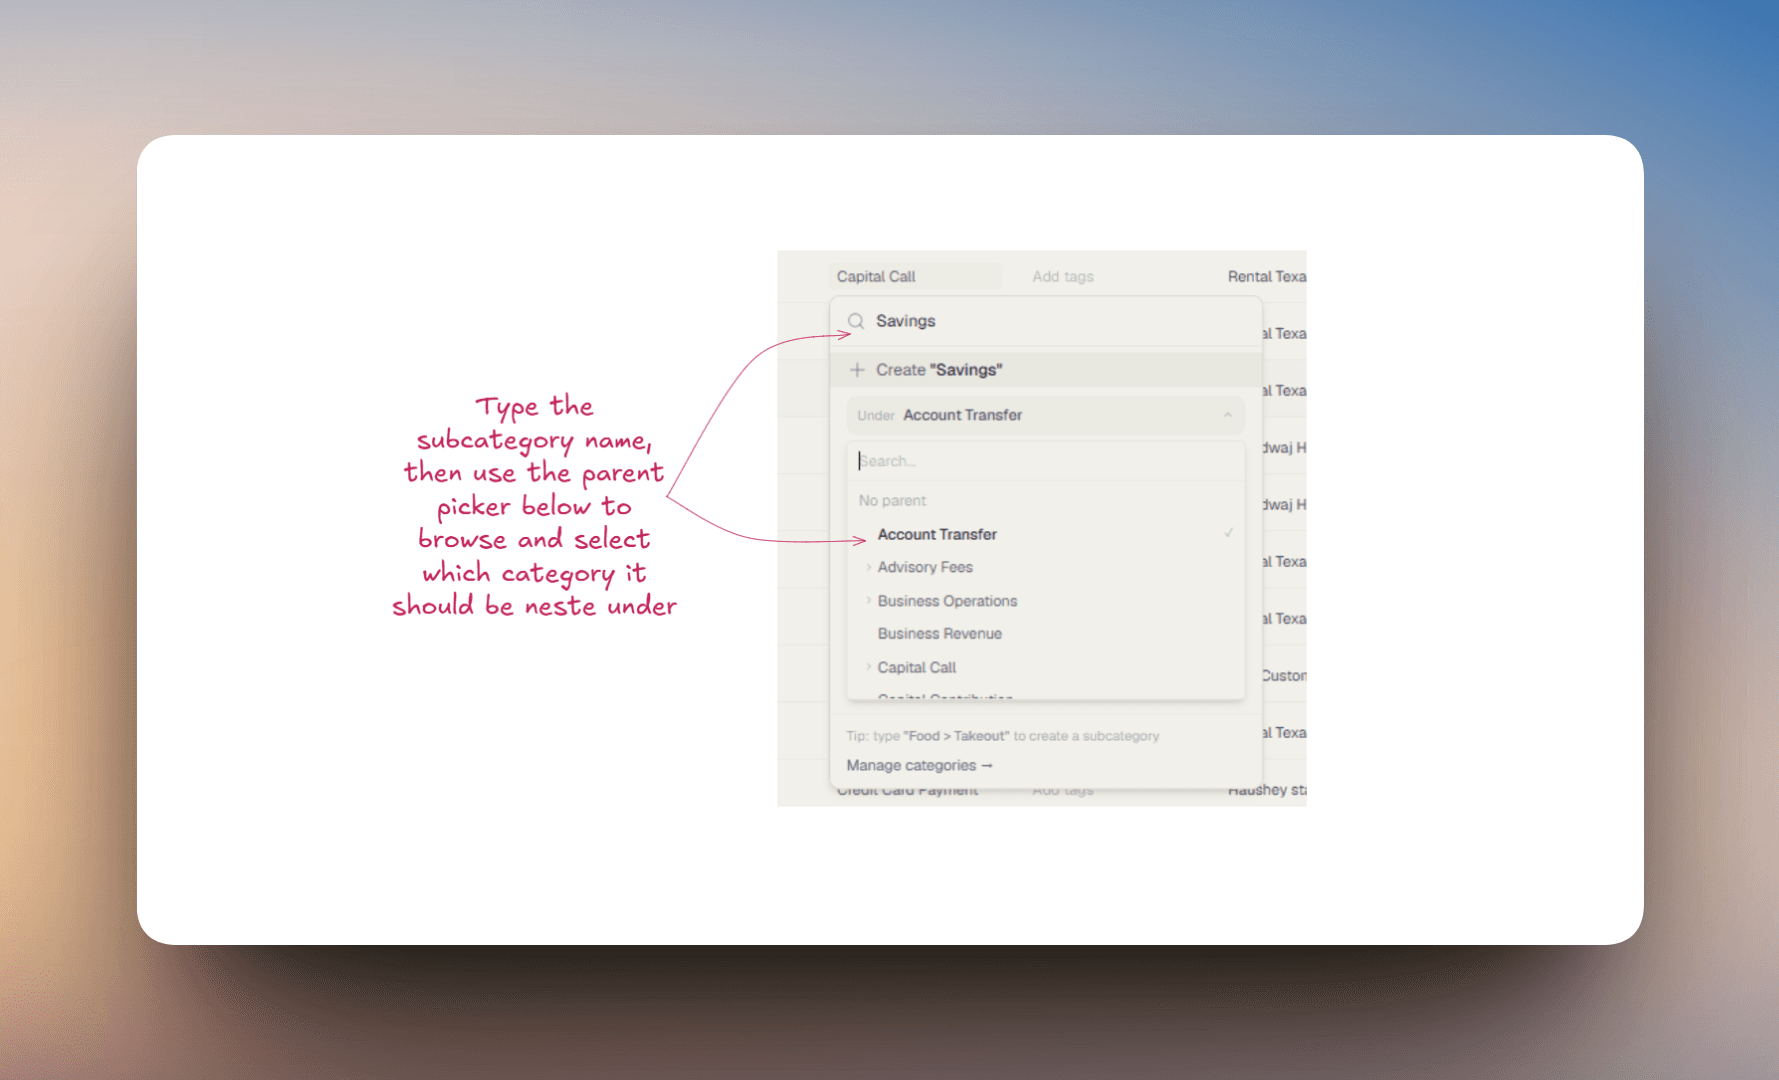
Create a subcategory - parent picker
Type just the new category name with no > (e.g., "Takeout"). A parent picker appears below the create row - browse or search your existing categories to choose where the new one should live, then click Create.
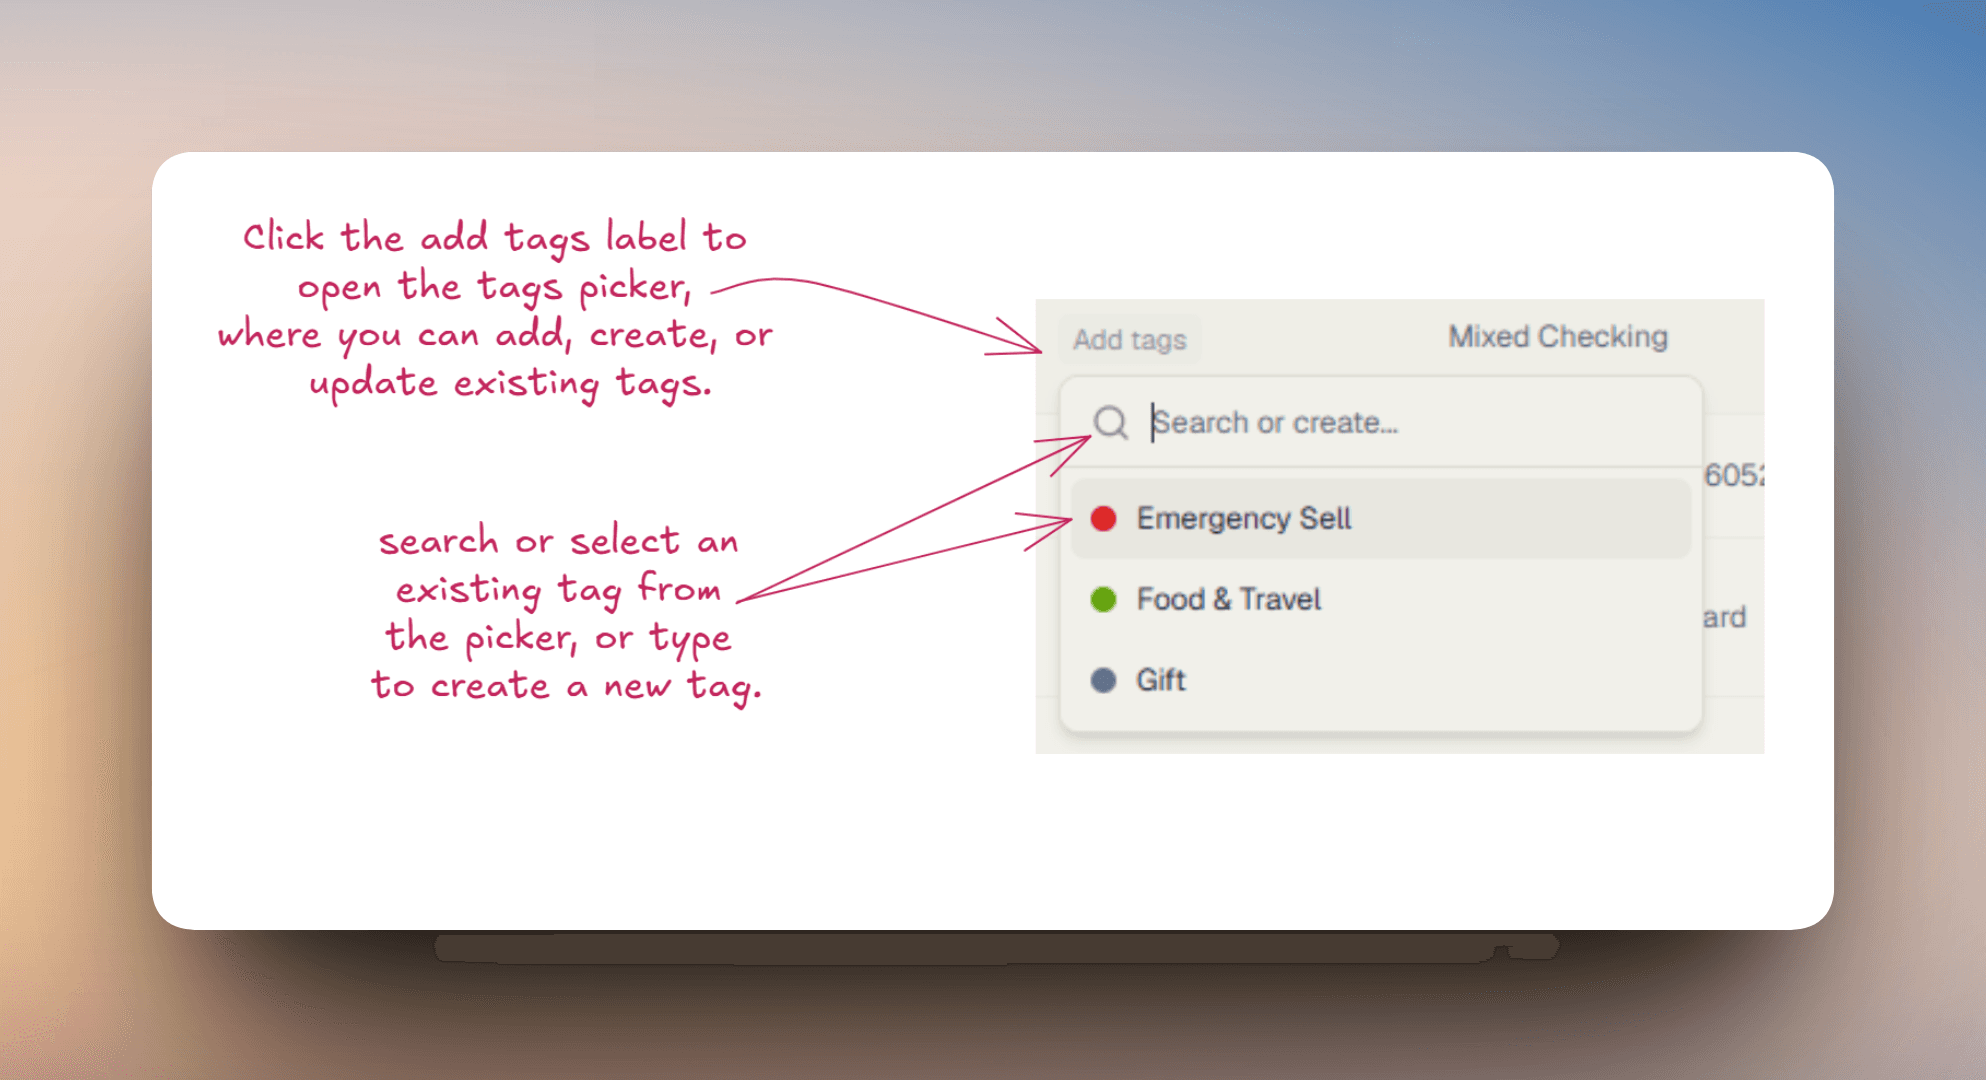
Add or manage tags
Click the tags cell on any row. Type a new tag name to create one (choose a color from the preset palette), or select from your existing tags. Multiple tags per transaction are supported. You can also rename or delete tags from this picker. Tags are most useful for cross-cutting concerns - a specific client, trip, tax label, or anything your accountant cares about.
Add a note
Click the note cell and type whatever context you want preserved. Notes stay attached to the transaction permanently, appear in search results, and are visible in exports. Press Cmd/Ctrl+Enter to save or Esc to cancel.
Assign to a property or entity
Click the assignment cell to link the transaction to one of your financial properties or entities. This lets you filter and report on transactions by asset - useful when a single bank account funds multiple properties or business entities. After assigning, the platform may offer to apply the same rule to similar transactions automatically.
Edit date, description, or amount (manual transactions only)
For transactions you added manually, click directly on the date, description, or amount cells to edit them inline. Use the full edit dialog (action menu → Edit) for all fields at once, including account, merchant name, and split allocations. These fields are locked on Plaid-imported transactions - the data comes from your bank.
Tags are most useful when you use the same ones repeatedly. Pick a small, consistent set - "Tax deductible," "Reimbursable," "Business - Entity Name" - and apply them systematically. A few well-used tags are far more useful than many one-off labels.
Adding transactions manually
Not every account can be connected automatically. The Add Transaction button in the toolbar lets you create transactions by hand - useful for cash payments, accounts your bank doesn't support via Plaid, or any transaction you want to track that doesn't appear automatically.
- Account - Required. Select which connected account the transaction belongs to.
- Date - Required. The transaction date.
- Amount - Required. Enter the amount and toggle between Debit and Credit to set the direction.
- Description - Required. A label for the transaction.
- Merchant - Optional. The merchant or payee name if different from the description.
- Category - Optional. Defaults to Uncategorized if left blank.
- Assignment - Optional. Link the transaction to a financial property or entity.
- Note - Optional. Any additional context you want to preserve.
- Tags - Optional. Add one or more tags for filtering and reporting.
Manual transactions are flagged as Source: Manual in the Source filter, so you can always distinguish them from Plaid-imported data. Only manual transactions can be deleted.
The Add Transaction button is only visible when your account has edit permissions. In read-only entity partner accounts, transaction creation and editing are disabled.
AI categorization & automation
Every imported transaction is auto-categorized by AI based on the merchant name, descriptor, amount, and your historical patterns. For common merchants - Apple, Uber, Starbucks - categorization is usually right. For less common merchants or business-specific transactions, the AI may guess wrong, and that's where your corrections matter.
When you change a category or assignment on a transaction, the platform checks if similar transactions exist - same merchant, same account. If it finds matches, it offers to:
- Update past transactions - Apply the same category or assignment to historical matches.
- Create a future rule - Automatically categorize or assign similar transactions when they import going forward.
Before applying, you can review the full list of affected transactions - up to 50 are shown with their status: Will update, Already applied, Conflict (manually set to something different), or Skipped. You decide what to do with each batch.
- Can do: categorize obvious retail and service transactions, recognize transfers between your own accounts, identify subscription patterns, surface recurring merchants for rule creation.
- Can't do: distinguish a business meal from a personal one without help, know that a hotel charge is reimbursable to a specific client, or know which property a transaction belongs to without an assignment.
The split is roughly: AI handles the rote work, you handle the judgment calls. The more corrections you make, the more accurate the system becomes over time.
If you decline an automation prompt, nothing changes beyond the single transaction you edited. You can always come back and apply a rule later by re-editing the same field.
Common workflows
Monthly review
Set the date range to the past month. Scan the transactions one page at a time. Fix miscategorizations by clicking the category cell. Add notes to anything that needs context. Spend 10–15 minutes once a month and the data stays clean throughout the year. When you correct a category, let the automation run - it catches the same merchant everywhere at once.
Tax season prep - business expenses
Filter to the full tax year date range. Use the Tags filter to pull up transactions you've tagged as "Tax deductible" or "Reimbursable." Use the Category filter to scan specific expense types. Export the filtered set and hand it to your CPA. The cleaner your tags, the less time this takes.
"Where did the money go" investigation
Set the date range to a specific month. Use the Category filter to step through spend categories one at a time - Restaurants, Shopping, Subscriptions, Transportation. The NET / IN / OUT metrics at the top update as you filter. Surprises usually show up in the largest categories.
Property or entity expense tracking
Use the Assignment filter to isolate all transactions linked to a specific property or entity. Combine with a date range for a clean expense view per asset. If transactions are missing, edit them and assign them - then let the automation apply the rule to similar past transactions.
Find a specific transaction
Use the search field. It searches merchant name, category, tags, notes, and account simultaneously. Faster than scrolling. Combine with a date range if you roughly remember when it happened.
Subscription audit
Filter by Category → Subscriptions, or search for recurring merchant names you suspect. Look for anything still billing that shouldn't be. Switch to Bank mode if you're not already there - subscription charges show up as bank/card transactions, not investment ones. This single sweep typically pays for the platform on its own.